Seized Lab
CyberDefenders Endpoint Forensics Lab

Scenario
Using Volatility2, utilize your memory analysis skills as a security blue team analyst to investigate the provided Linux memory snapshots and figure out attack details.
Question 1
What is the CentOS version installed on the machine?
Answer 1
A quick search online for different versions of CentOS was required for this answer, knowing what profile image was supplied already was a large help.
Press enter or click to view image in full size

Question 2
There is a command containing a strange message in the bash history. Will you be able to read it?
Answer 2
So getting different profiles loaded into Volatility2 has always been a pain for me, for whatever reason. So I am going to note down how I do it.
First of all, with the profile zip file, go to the following directory:
Second unzip the file.

Third, check if the profile in loaded into Volatility.
When specifying a profile, you have to use the entire string.
So as an example, I use the following to find bash commands:
I hope this helps anyone that is struggling a little bit. It can be a pain to get it working. If you ever find that the profile has not loaded, my fix was to delete the file and make sure I UNZIP the profile while in the folder. Don’t copy and paste a unzipped version. Just unzip it in the location its supposed to be in.
Now on with the question at hand.
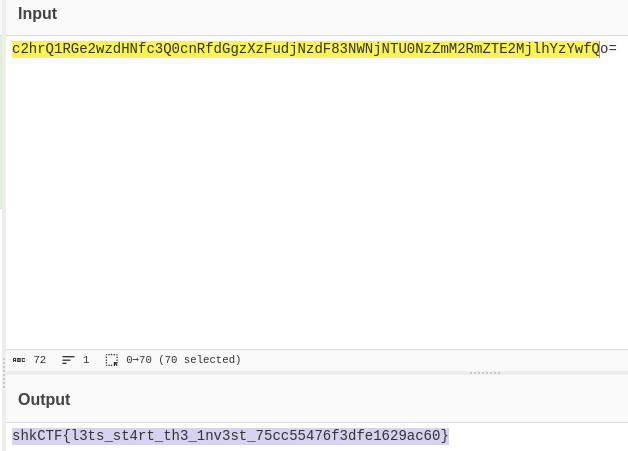
The above string was what I found strange in the bash history. It seems to be a base64 string. So I threw it into CyberChef.

Question 3
What is the PID of the suspicious process?
Answer 3
Using the following command:
I was able to see the processes that were running at the time of capture. Some of which stood out to me as strange, insmod and ncat. insmod stood out since it was something that was in the bash history, but that wasn’t correct. ncat on the other hand, otherwise known as netcat, is a suspicious command for a regular user to use.
Question 4
The attacker downloaded a backdoor to gain persistence. What is the hidden message in this backdoor?
Answer 4
I tried a few commands that would enumerate the files within the file system, to no success. So i returned to the bash history to find some clues. There were actually 2 different git clone requests that yielded some answers.
The second, LiME, was a well known repo. But the first git clone request was for a very suspicious PythonBackup.
Navigating to the files on github and searching through them all was a little work, but I managed to find a pastebin link. I have known about code that is hidden in plain sight in github files before, you always have to check the scroll bar. To see if there is code that has been spaced out of clear view.

Question 5
What are the attacker’s IP address and the local port on the targeted machine?
Answer 5
I knew I was looking for something to do with ncat, so I used the following command to narrow down any network connections that ncat was using.
As per the script in the previous question, I knew the port was 12345. The second IP address in this line is the outbound connection, so that is the attackers IP address.
Question 6
What is the first command that the attacker executed?
Answer 6
Using the help function gave me a list of commands. The following was the most useful:
It gave me a list of processes and commands that had been used alongside them. In this instance I was looking for commands that happened directly after setting up ncat. Giving me this:
Question 7
After changing the user password, we found that the attacker still has access. Can you find out how?
Answer 7
Heading back to the bash history, there was a key piece of evidence that stood out. The use of vim to edit rc.local, a file that is used to run programs on start up. Not really knowing where to go from here, I needed a hint. Which led to me using the following to extract all the information from the vim usage.
Then from there, I used strings to grab anything readable. From there I looked for any instances of rc.local. There were a couple of mentions, but nothing that lead anywhere. Requiring another hint I found that a base64 string was present and below that an attempt to write over ssh keys.
Question 8
What is the name of the rootkit that the attacker used?
Answer 8
I learnt something new about rootkits for this question, a rootkit uses syscall hooking which involves modifying the system call table to redirect legit functions to malicious ones.
Using this information I used the following command to look for hooked calls:
Giving me the following:
Question 9
The rootkit uses crc65 encryption. What is the key?
Answer 9
Knowing that the rootkit had loaded itself into the kernel. I used the following command to hunt down the above rootkits name.

This was a tough box for me, I needed a little help towards the end. Knowing a little bit more about rootkits now will help in the future. I was using -h a ton for different commands and I would advice people do the same. Also using the different parameters that volatility provides to grab the exact information needed. Example below:
Last updated